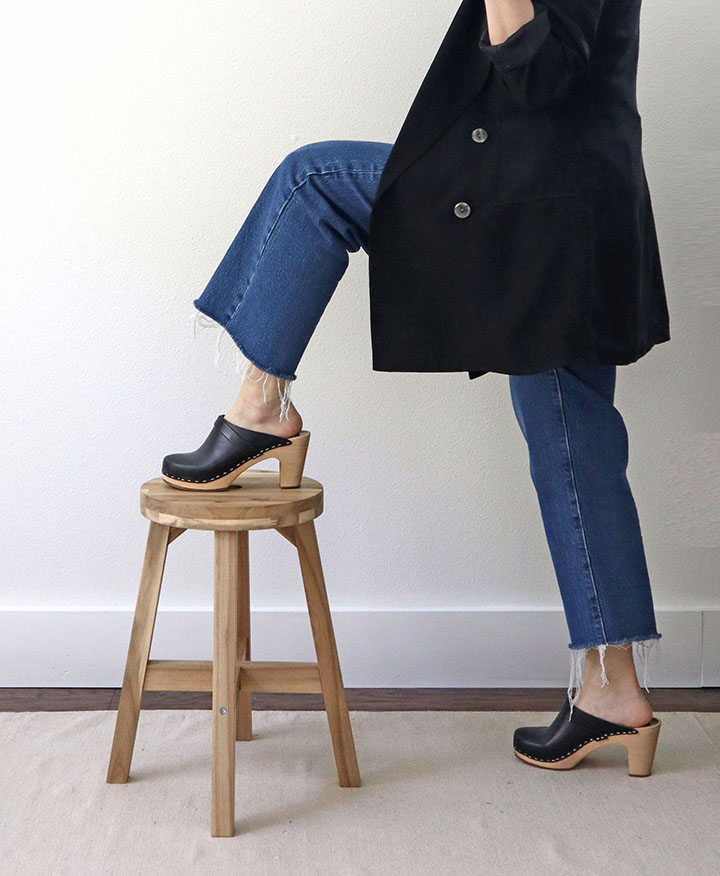
I chop the hem off pretty much every pair of jeans that I own. I started doing this because a lot of jeans were too long for me and I didn’t want to have them professionally tailored. I had gone that route quite a few times in the past, but I was never happy with the results, even with a eurohem where they put the original hem back on. I have always liked the frayed jeans look and I like how it gives a relaxed vibe to an outfit. So, over the past few years, I have figured out how to get the perfect “lived-in” look of a frayed jeans hem from the very first wear!
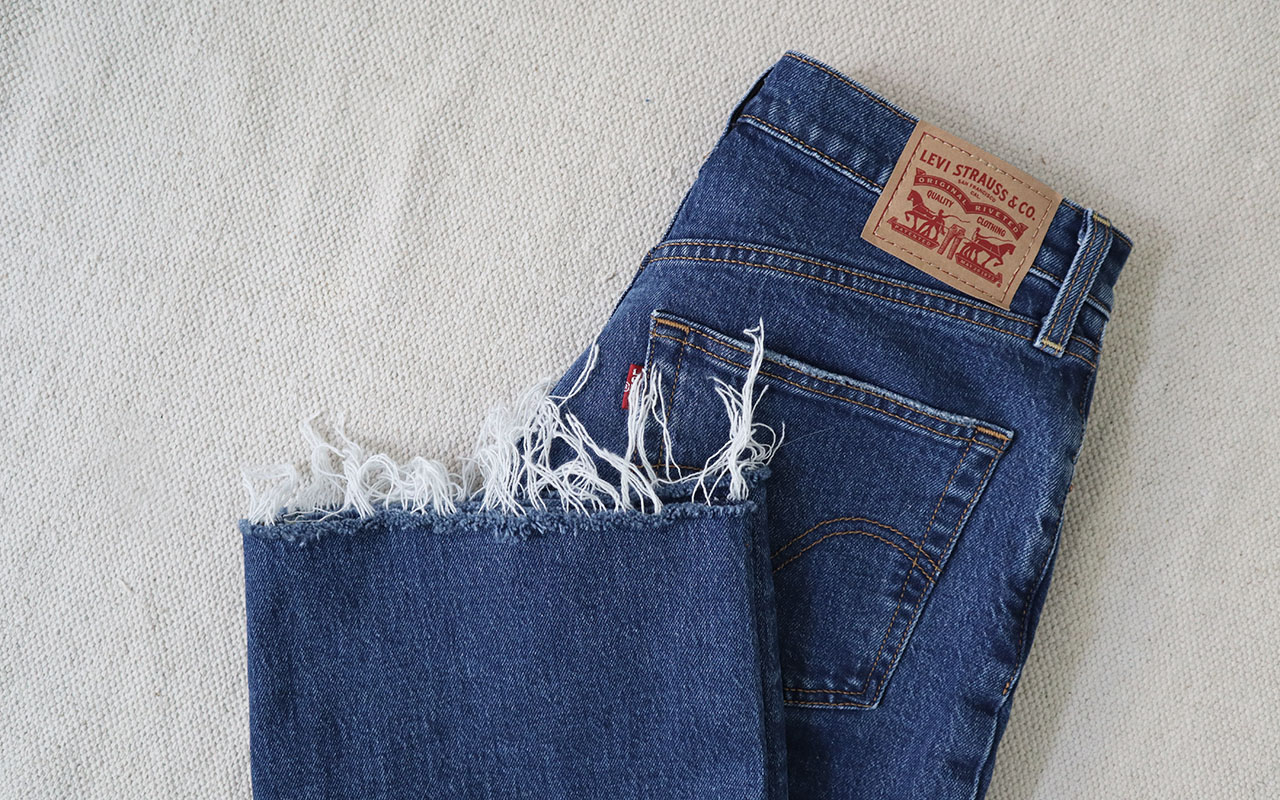
I recently purchased a pair of Levi’s Ribcage jeans, secondhand from Ebay. If you’re interested in how I shop for secondhand clothing online, head to this post. When they came, they were a good length but I wanted them to be slightly cropped and I also wanted the frayed jeans hem. So I chopped them off and got to work.
How to DIY Frayed Jeans Hem
Step 1: Try on your jeans and looking in a mirror, decide the length that you want your jeans to be.
Step 2: Use a safety pin or a fabric marker to mark the spot that you want your jean hem to be, and remove your jeans. Place the mark in the front, middle of your jeans leg. In this example, I used a safety pin to mark the place that I wanted to cut.
Step 3: Lay your jeans on a flat surface and make sure that the front and back of the hem line up.
Step 4: Using a measuring tape, measure the distance from the bottom hem of the jean to the mark that you made, which will be the new bottom hem once you cut the jeans. For me, I wanted to remove 2.5 in (6.35 cm).

Step 5: With this distance in mind, use the measuring tape to make a cut on each side of the leg. In this example, I made a cut 2.5 in from the bottom of the original hem on each side.

Step 6: Using the cut marks and measuring tape (moving it along the leg as you go to make sure you get an even cut), cut from one side to the other.


Step 7: Taking a pair of scissors, open all the way and holding the raw jeans hem between the scissor blade and your thumb, pull the hem through slowly, going against the grain (the direction that that white threads face). This will loosen the threads. Once you have a few threads loose, pull them from where they originate to the side of the hem.


Step 8: Once you are happy with the amount of fraying, move on to the other side and repeat the process.

Step 9: Once both legs are frayed, toss them in the washing machine for a short wash cycle and then hang them to dry.
Step 10: Wear and enjoy your perfectly frayed jeans!


Until next time,

Pin it for later…


Pingback: The Best Way to Resize a Belt – Uncomplicated Spaces
Pingback: Easy And Fun Ways to Style A Dress over pants - Uncomplicated Spaces
Pingback: A Sustainable Wardrobe - 9 Easy Ways to Get Started - Uncomplicated Spaces