I’m a firm believer that the most sustainable clothing is the stuff you already own. I’m also a big believer that if something isn’t working, fix it. Don’t throw it away. Find a way to make it useful again. And with those two things in mind, and because something in my closet wasn’t working, I decided to put together a post to outline the steps I took to crop a top.
I think we all own clothing items that we really like but that we don’t wear because something just isn’t right. And I think sometimes we just get rid of that item, or push it to the back of our closets, only to go and purchase something similar, but more along the lines of our current style. I know this has been true for me.
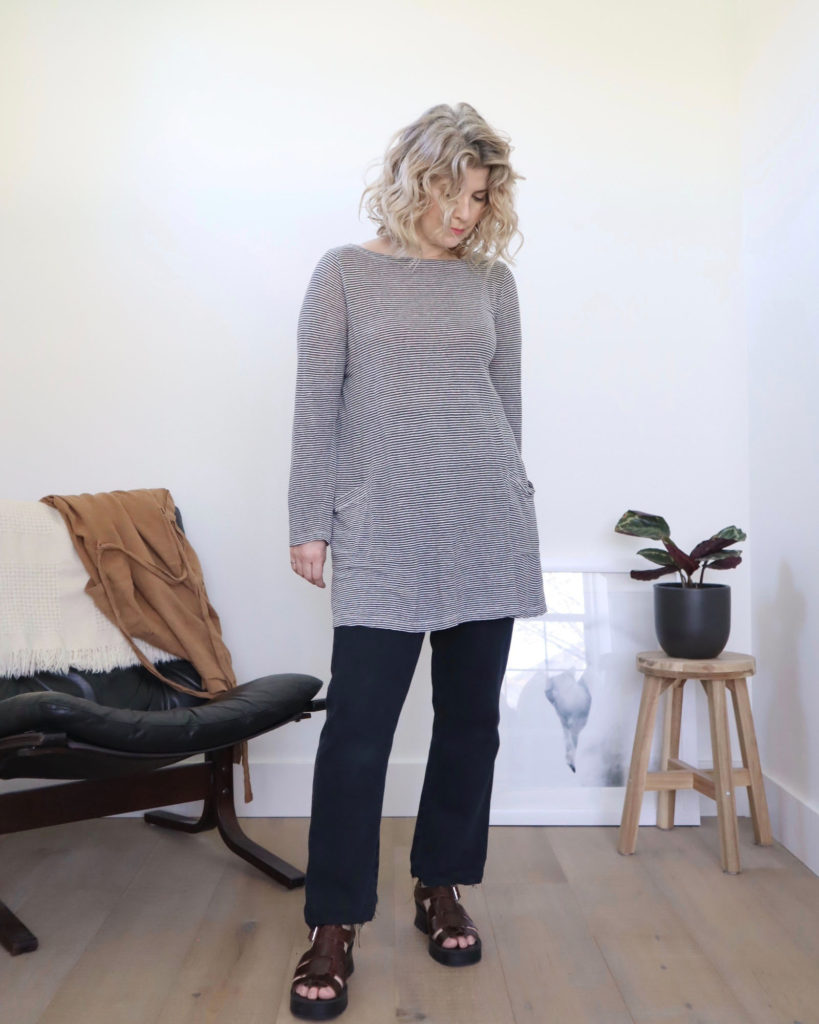
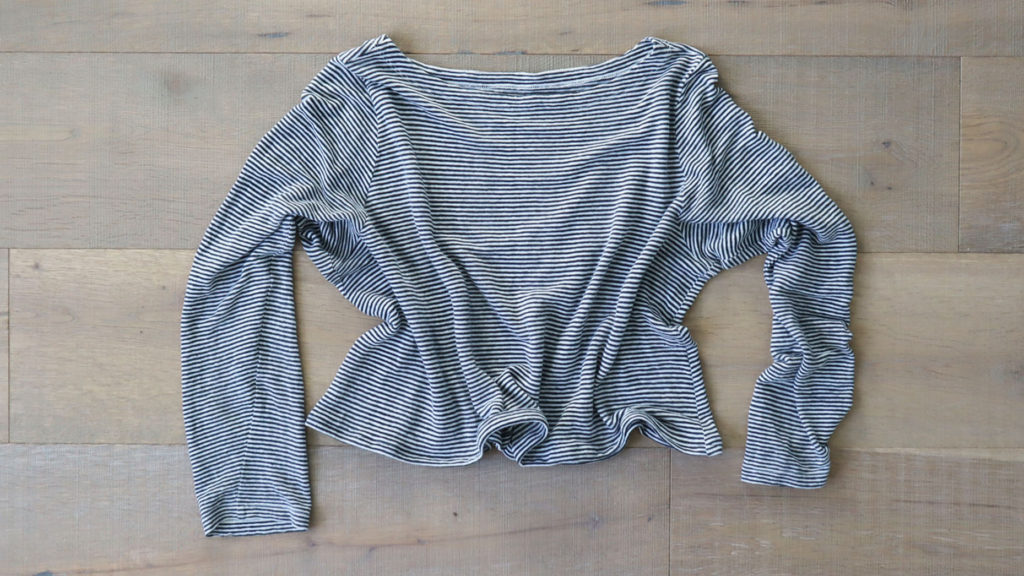
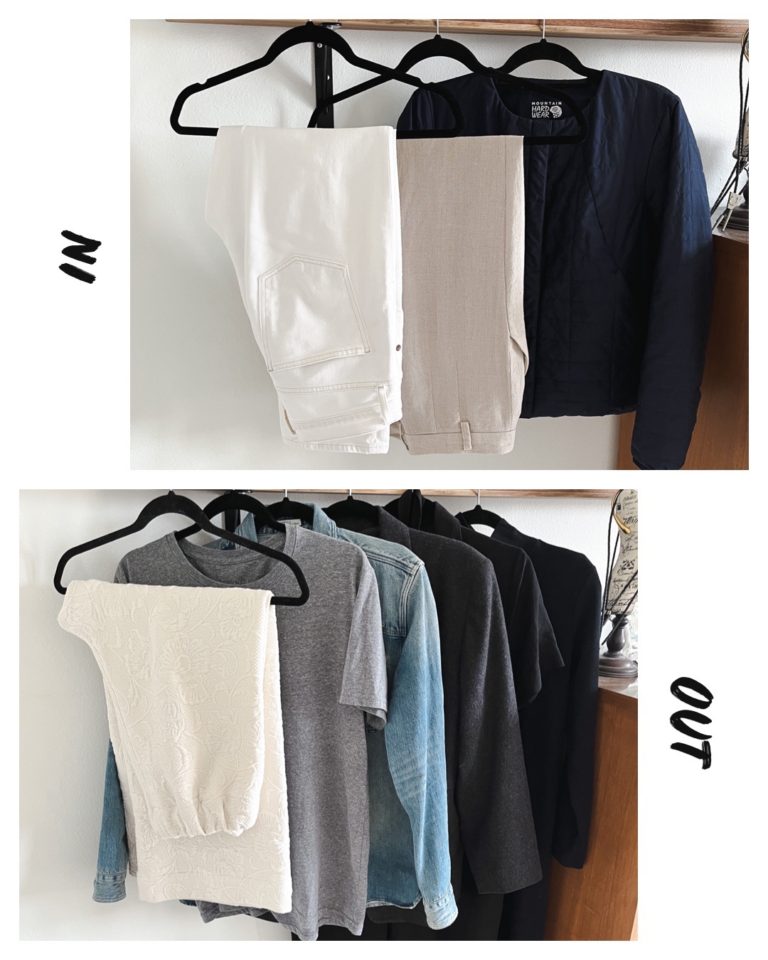
I haven’t bought any clothing since January 2nd and I’d like “something new”, aka “something old that feels new” to add to my spring capsule. I’ve had a black and white striped tunic in my alteration basket for a while.
It’s actually the very first piece of ethical clothing that I consciously bought. When I quit fast fashion, the only ethical brand that I could buy locally was Eileen Fisher and I found this striped tunic on sale at a local department store.
I love that it’s a linen/cotton blend and at the time I purchased this, I was really into tunics and leggings. But I just don’t enjoy tunics anymore and haven’t for a while now. I have worn this tunic tucked into a skirt so that it looked like a top and I really love it that way. And I would really love to have a black and white striped top for the warmer months to wear with jeans or shorts.
So, I’m going to crop this top. Not into a crop top, but into a length that can be fully tucked or french tucked into high waisted pants. Or left to hang freely. I feel like there will be more so many more styling options.
The method that I use is a quick and easy way to crop a top. And depending on what you do once you’ve cut it to the desired length, it may only take you a few minutes, but the longest it will take is a few hours. Which is pretty good for a new top…much less time, money and effort than heading out to the mall to search for something. And definitely better for the planet.
Tools You’ll Need:
top
safety pin
measuring tape
scissors
sewing pins
thread
clothes iron (optional)
sewing machine (optional)
How to Crop a Top – Step 1:
The first thing that you’ll need to do is to try the top on. Then, looking in a mirror, experiment with folding the top up until you find the length that gives you the look you’re after.
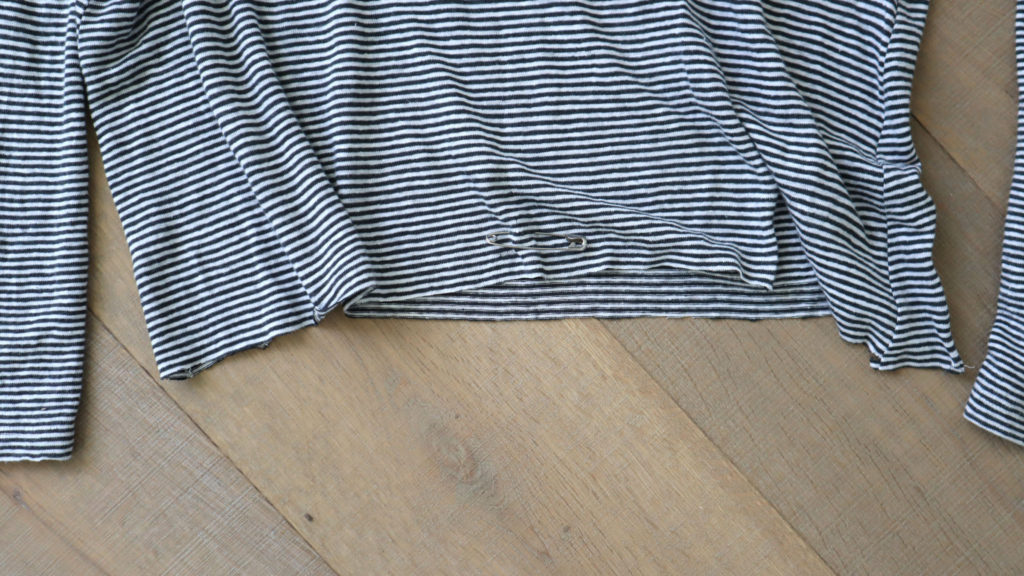
Once you’ve found the perfect length, use the safety pin to pin it in place.
Step 2:
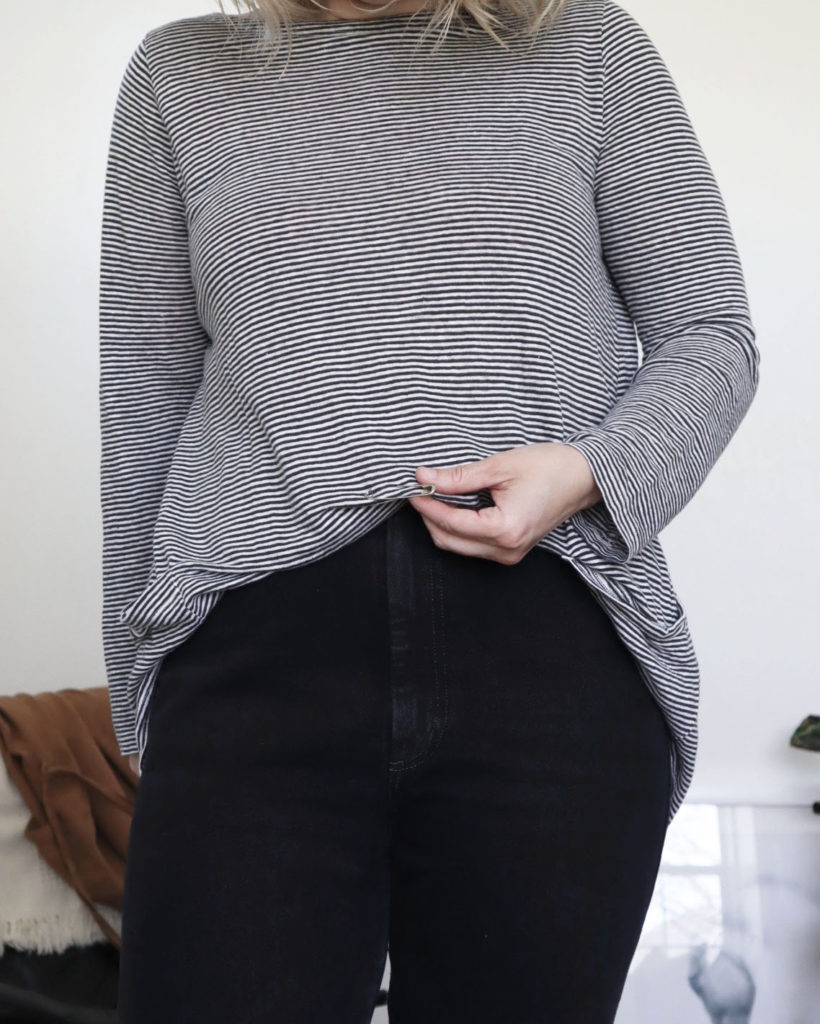
With your safety pin securely in place, lay the top on a flat surface. If you plan to hem your, determine the extra length you will need. If you don’t plan to hem and are looking for a raw edge, cut a straight line where you placed the safety pin.
I did plan on hemming my top and I wanted a 1/2″ hem so I measured out and extra 1″ (to fold 1/2″ and then fold another 1/2″ and sew). I placed a pin at 1″ beneath my desired finish length to indicate my cut line. I then cut at 1″ below my safety pin.
If I was working with a plain top (not patterned), I would have cut the front and back at the same time. As I was working with stripes, I first cut along one of the lines on the front and continued on around the back along the same line.

How to Crop a Top – Step 3:
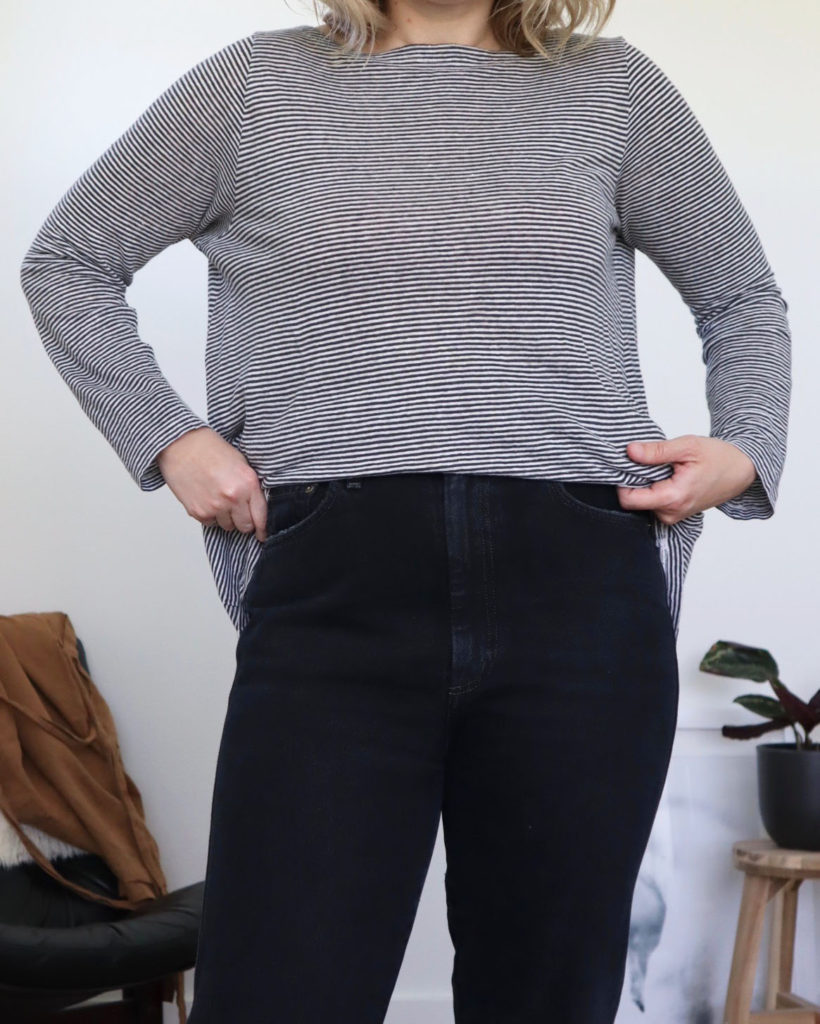
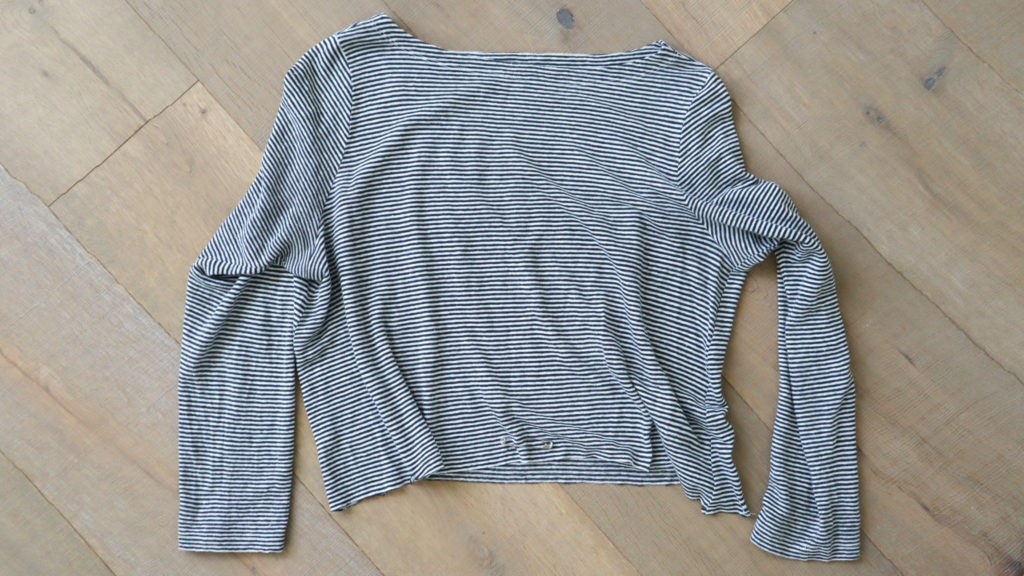
If you prefer a raw hem, congrats, you can call it quits at this point. You’ll end up something like this…
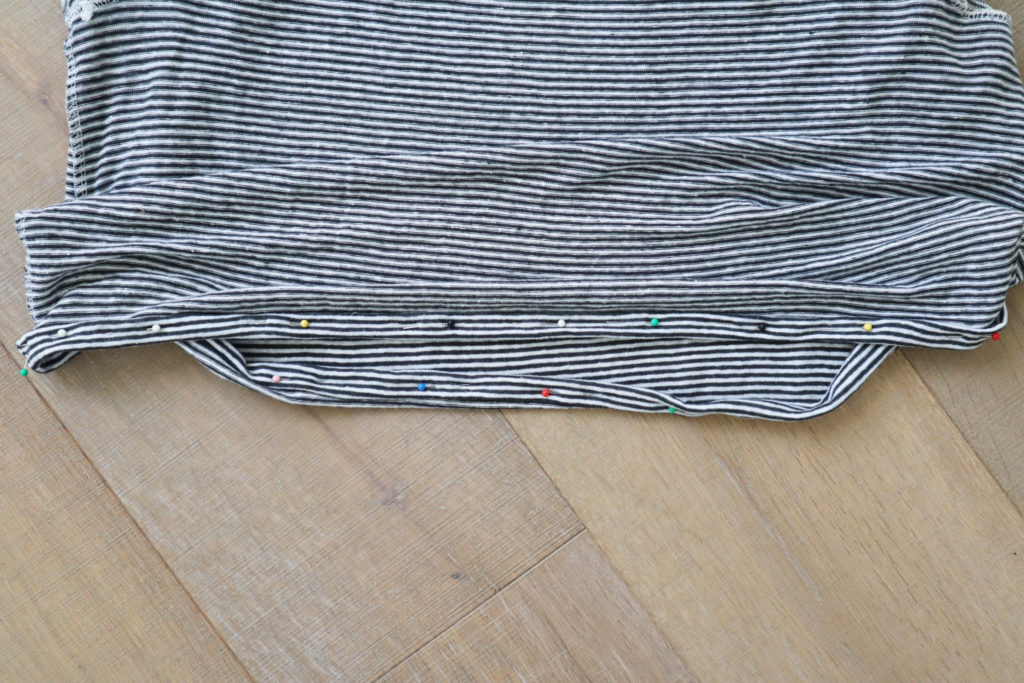
If you’re hemming your top, fold the bottom up 1/2″ and then another 1/2″ and pin all the way around. You can use a clothes iron here to press your seam before sewing.
Step 4:
This is where the sewing part comes in. If you have a sewing machine, go ahead and make a straight seam all the way around. This is the method that I used.
However, if you don’t own a sewing machine, you can handsew the hem all the way around. This takes a little more time but it’s a very relaxing activity and the outcome is very beautiful.
Here are a few handsewing tutorials if you haven’t done it before.
This one teaches a basic hand stitch.
This one illustrates 3 different hand stitches. A special shoutout to Alexis Bailey for letting me know about this video when I first tried hand sewing.
Step 5:
Give yourself a pat on the back. You just took an item that you weren’t loving and turned it into something that you will be excited to wear. Instead of going to the mall, you shopped your closet. And maybe you picked up a new skill or two.
Now put that masterpiece on a show it off. I’m proud of you!
My Final Result
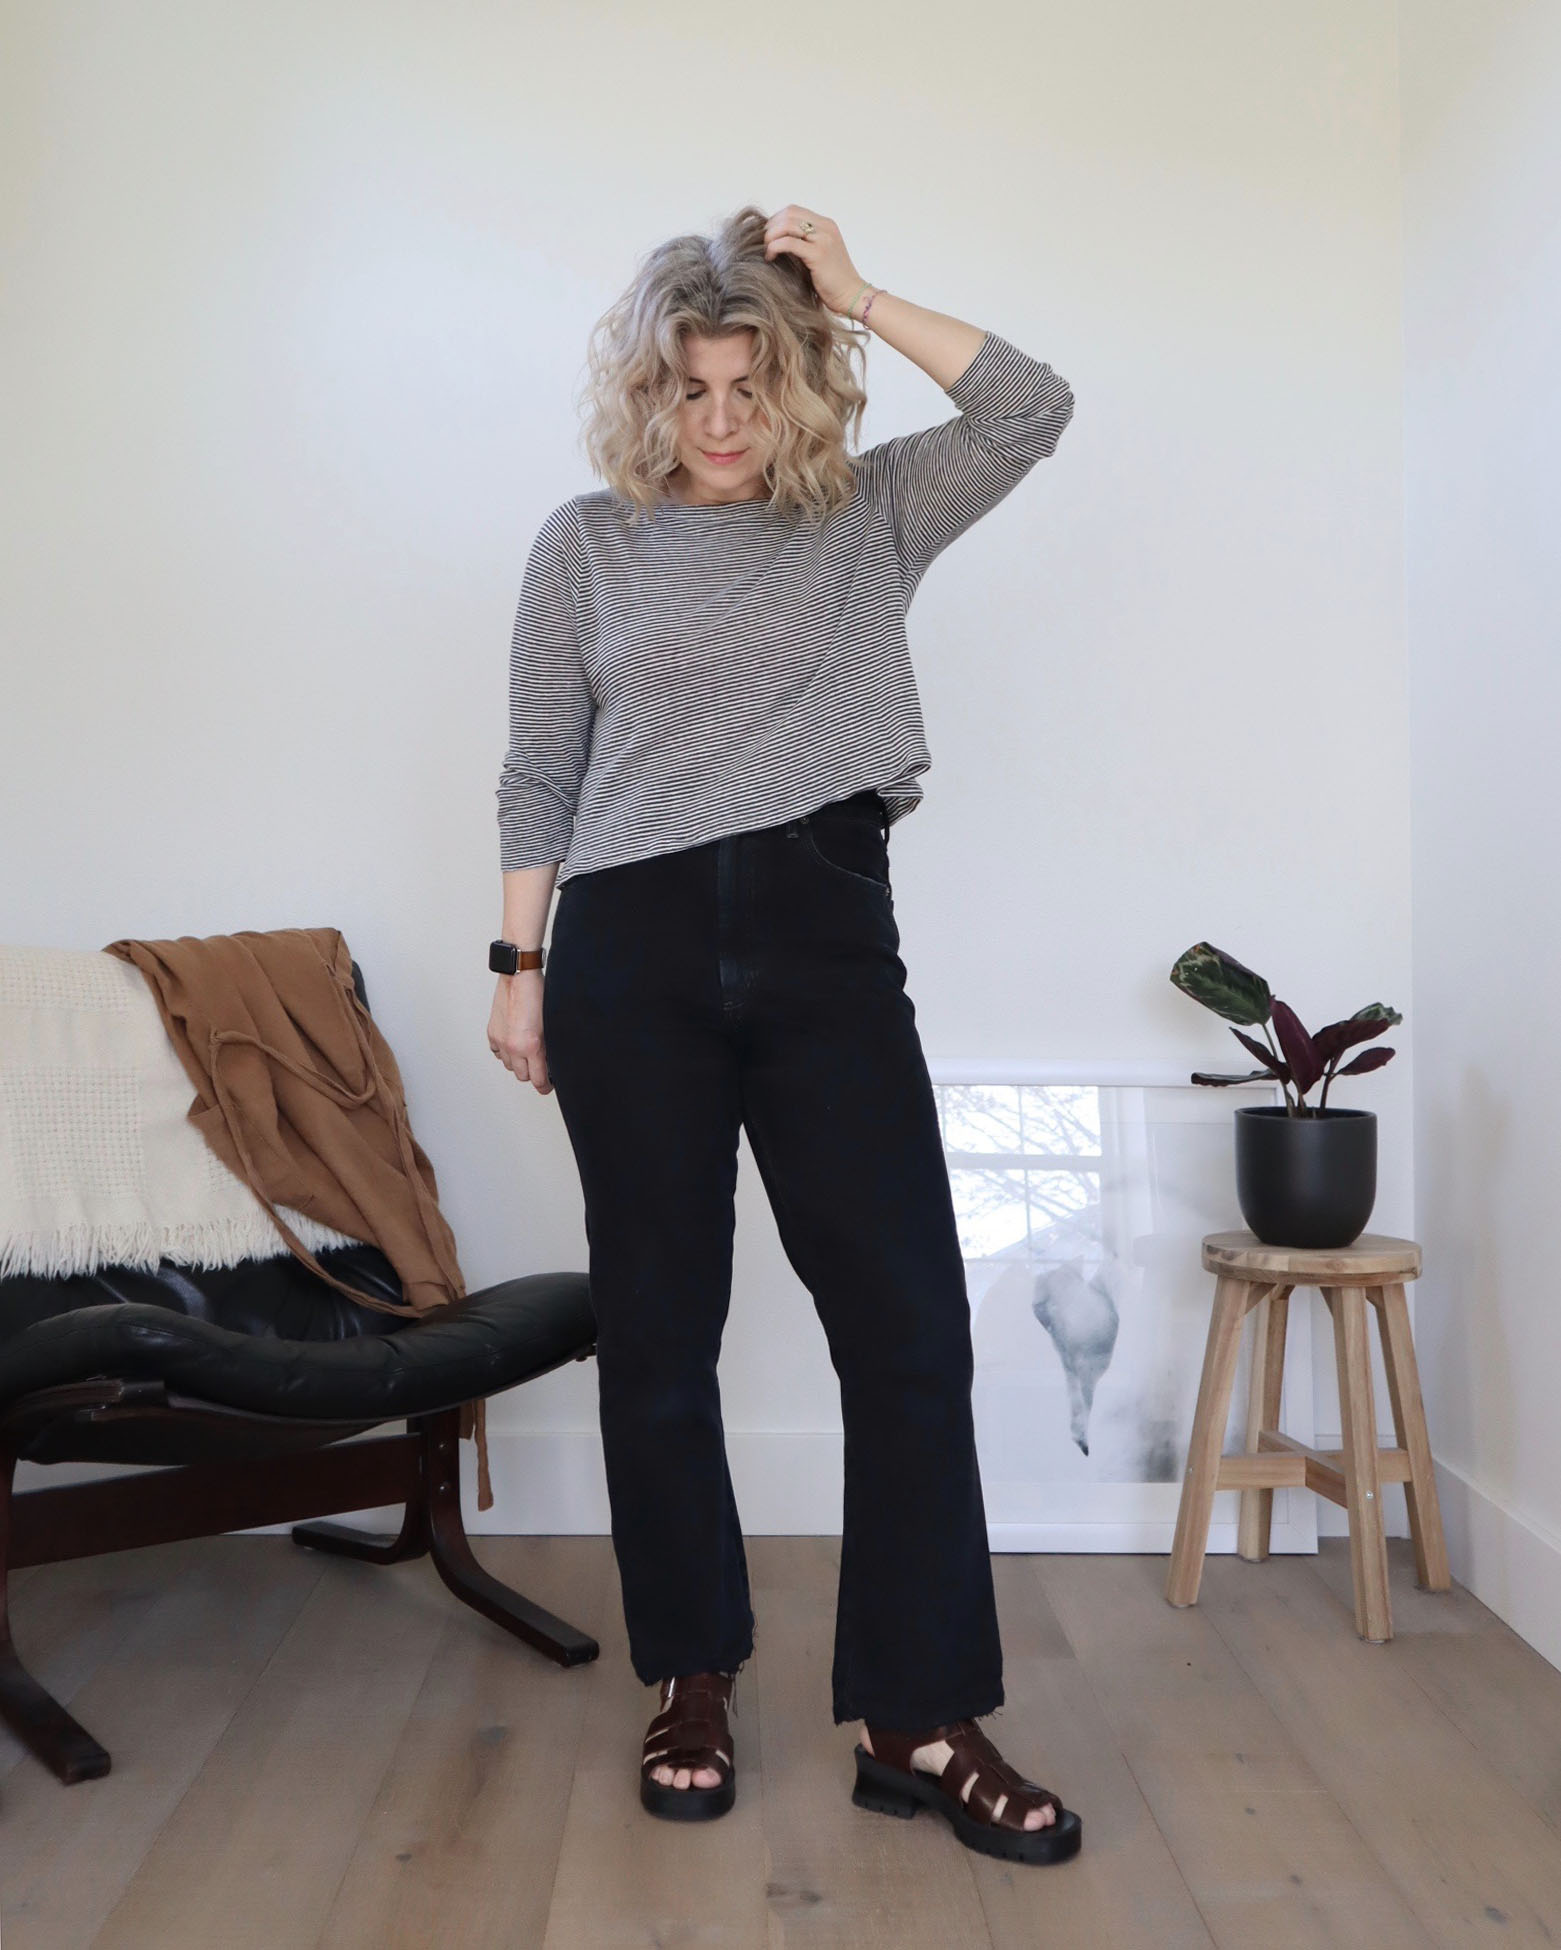
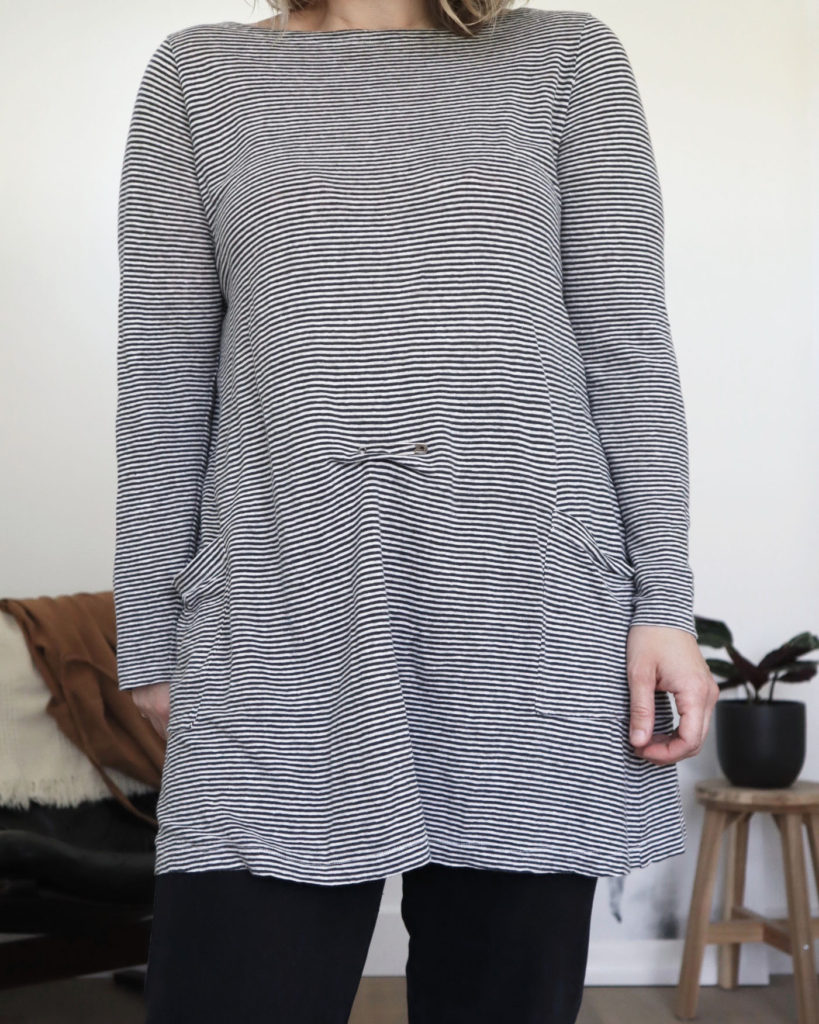
This top turned out both exactly how I wanted and better than I thought!
It’s light and airy and I already know that it will be a heavily worn item in my spring and summer wardrobe.
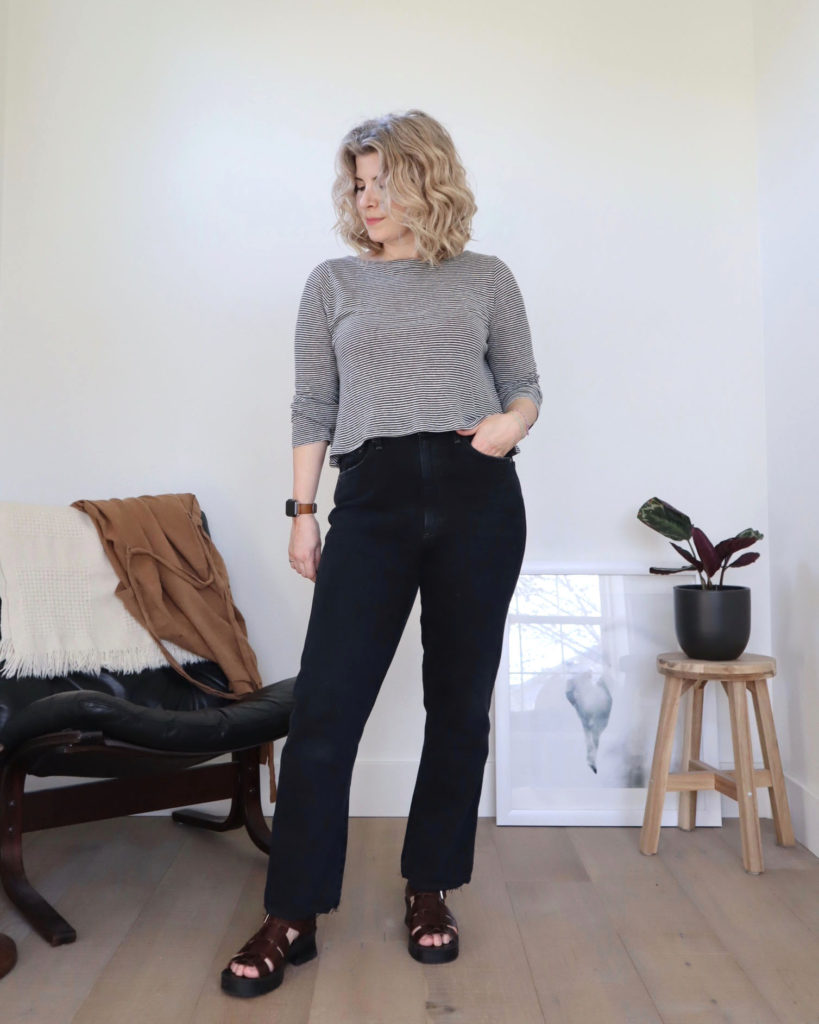
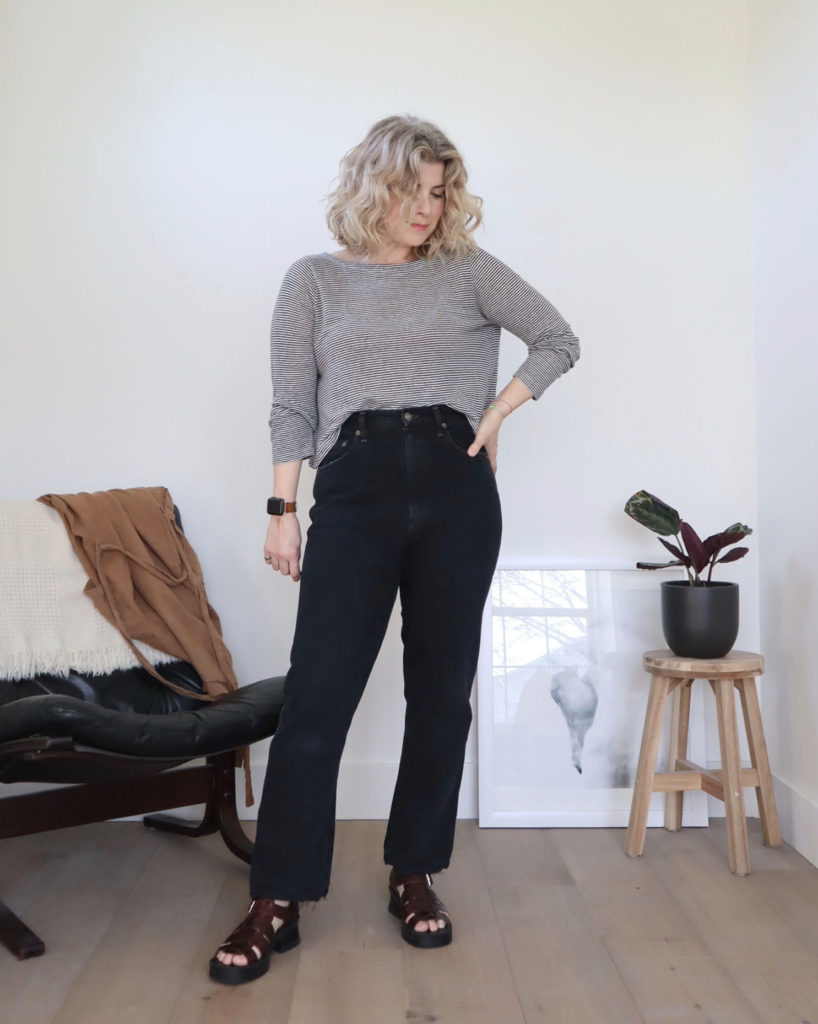
These jeans are pretty high waisted and the top ends just below the waistband.

It even passes the raised arm test.

And it looks great in a french tuck (just the front part is tucked in while the rest hangs free).
I think this upcycling project to crop a top was a huge success. And I’m really happy with the end result. But this is not the first upcycling clothing project I’ve done…check out this post to see how I altered a cami that I wasn’t wearing.
What do you think? Do you like the end result better than the original? Have you ever done an upcycled clothing project? I’d love to hear about it in the comments.
And let me know if you enjoyed this post. Or if there’s another type of sustainable fashion post you’d like to see. It really helps me know what content to create that’s valuable to you.
Until next time,
If you liked this post, please share it. It really helps me get the word out and reach more people. Thanks for your support.

Pingback: How to Wear Wide Leg Pants 2021 - Uncomplicated Spaces
Pingback: Outfit Ideas from My Top 5 Outfits of the Month - Uncomplicated Spaces
Pingback: 7 Important Questions to Ask As a Conscious Consumer - Uncomplicated Spaces